Now that the gifts have been given, I thought I'd share the details on the ones I made.
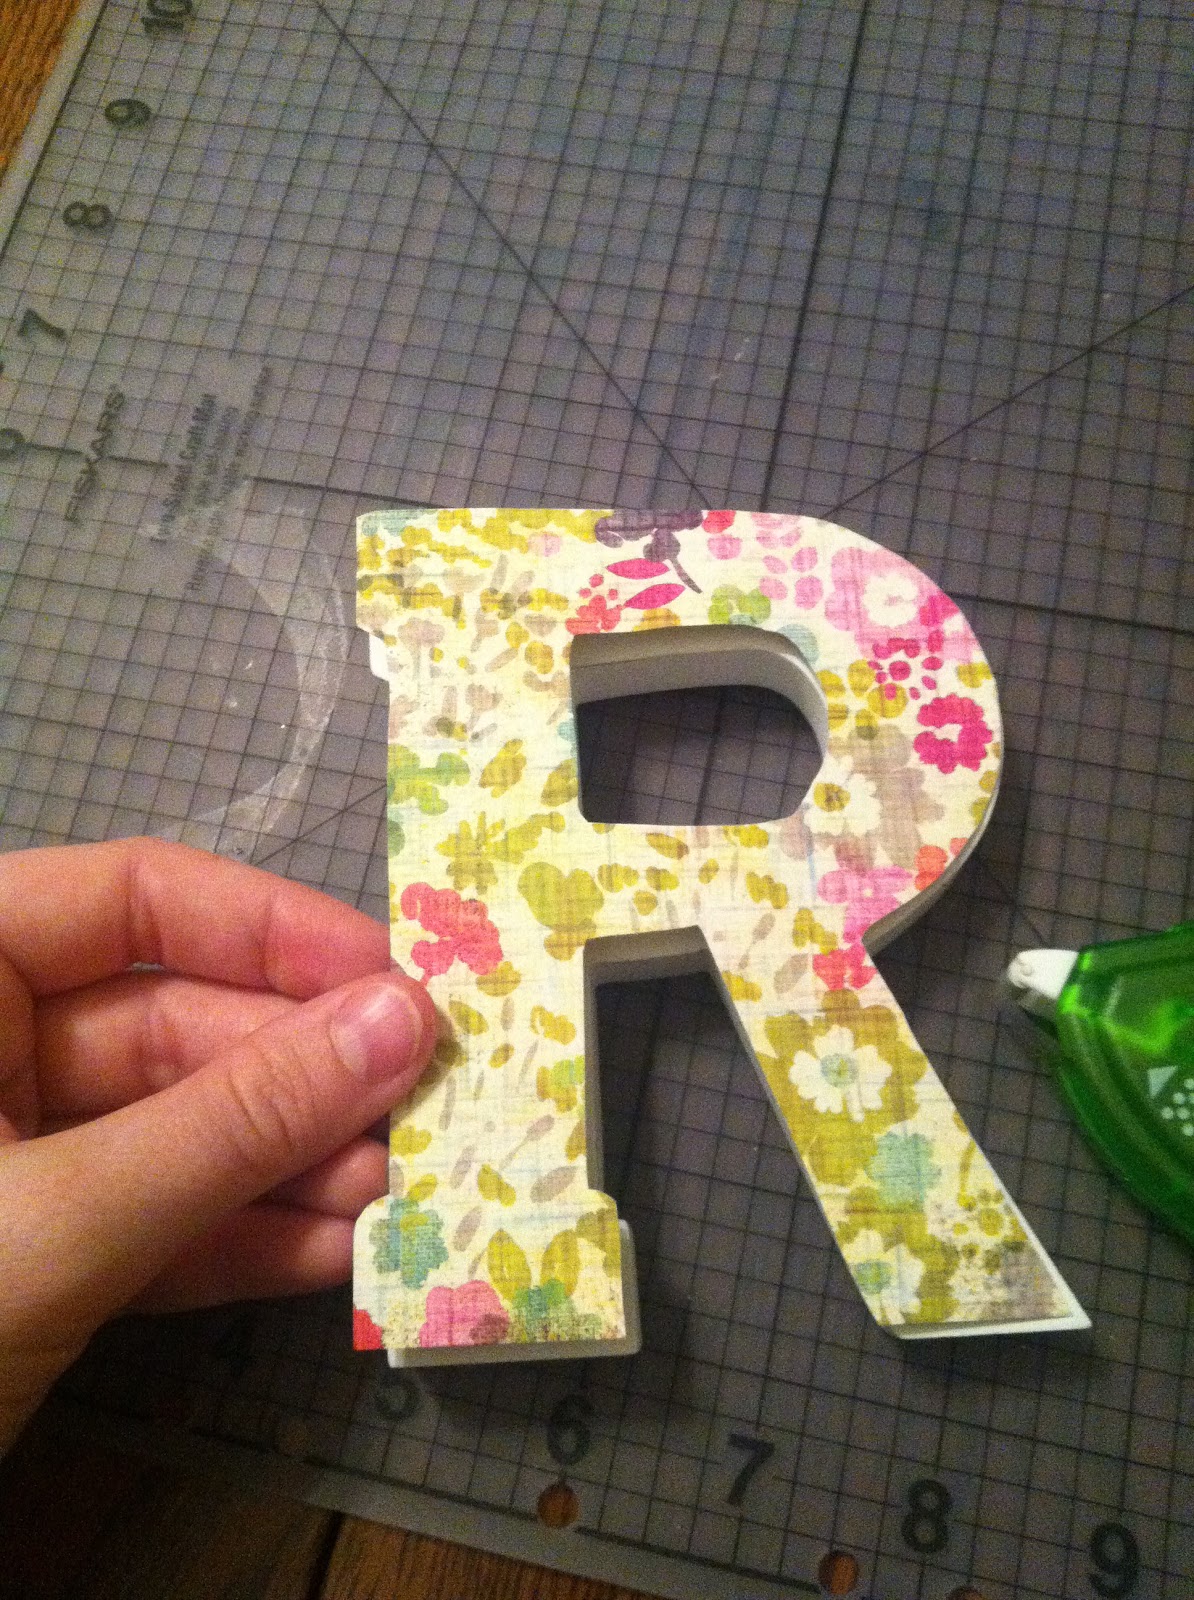
Last year, I made my mom some big initial letters to go in her kitchen. I picked the paper because it reminded me of vintage aprons. My sister moved into a new apartment last August, and had been asking for some of her own. Perfect Christmas present for her for this year.
I headed over to Michael's, and picked up some cheap wooden letters. These were slightly different than the cardboard ones I had purchased at Hobby Lobby for my mom's (and a set I made for myself). I was actually really excited about these because they were already painted white, which meant less work on my part than the cardboard ones. And they are a bit smaller, which I thought would keep it flexible, in case she wanted to take them to her office.
I also picked out some cute craft paper to use. The colors reminded me of some flowery tops that she likes to wear. The nice part about the Basic Grey craft paper line (my absolute favorite) is that the sheets are double-sided, two fun patterns in one!
I then used a pencil to trace the letters on the craft paper. I had to go back afterwards and erase the pencil lines that may have ended up on the letters (don't forget this step).
Next I carefully cut out the paper letters, and glued them down.
Ta Da! Cute and quick project. And a great gift!
Every penny counts, especially when you are young and trying to pay the bills. Here's my attempt to be creative with my fun and my funds.
Tuesday, January 3, 2012
Monday, January 2, 2012
Christmas Crafting: Danish Hearts
Okay, so Christmas has clearly come and gone, but I thought it was worth sharing some of my end of the year projects/adventures. I wrote these awhile ago, but it took me a bit longer to add in the pictures...
My mom's family has Danish roots and they have embraced many Danish traditions that they are now passing on to the younger generation. Each year, we come together for Cookie Weekend, where we bake Klejner, a Danish cookie.
While at cookie weekend this year, one of my aunt's brought the supplies to teach us to make Danish hearts that look like little woven baskets, which you may have seen gracing the Christmas tree before. My sister was interested in learning, and I was all for it too!
We freestyled it, but you can also find instructions in the book, Delectably Danish: Recipes and Reflections, by Julie Jensen McDonald. You better believe that each of us has a copy!
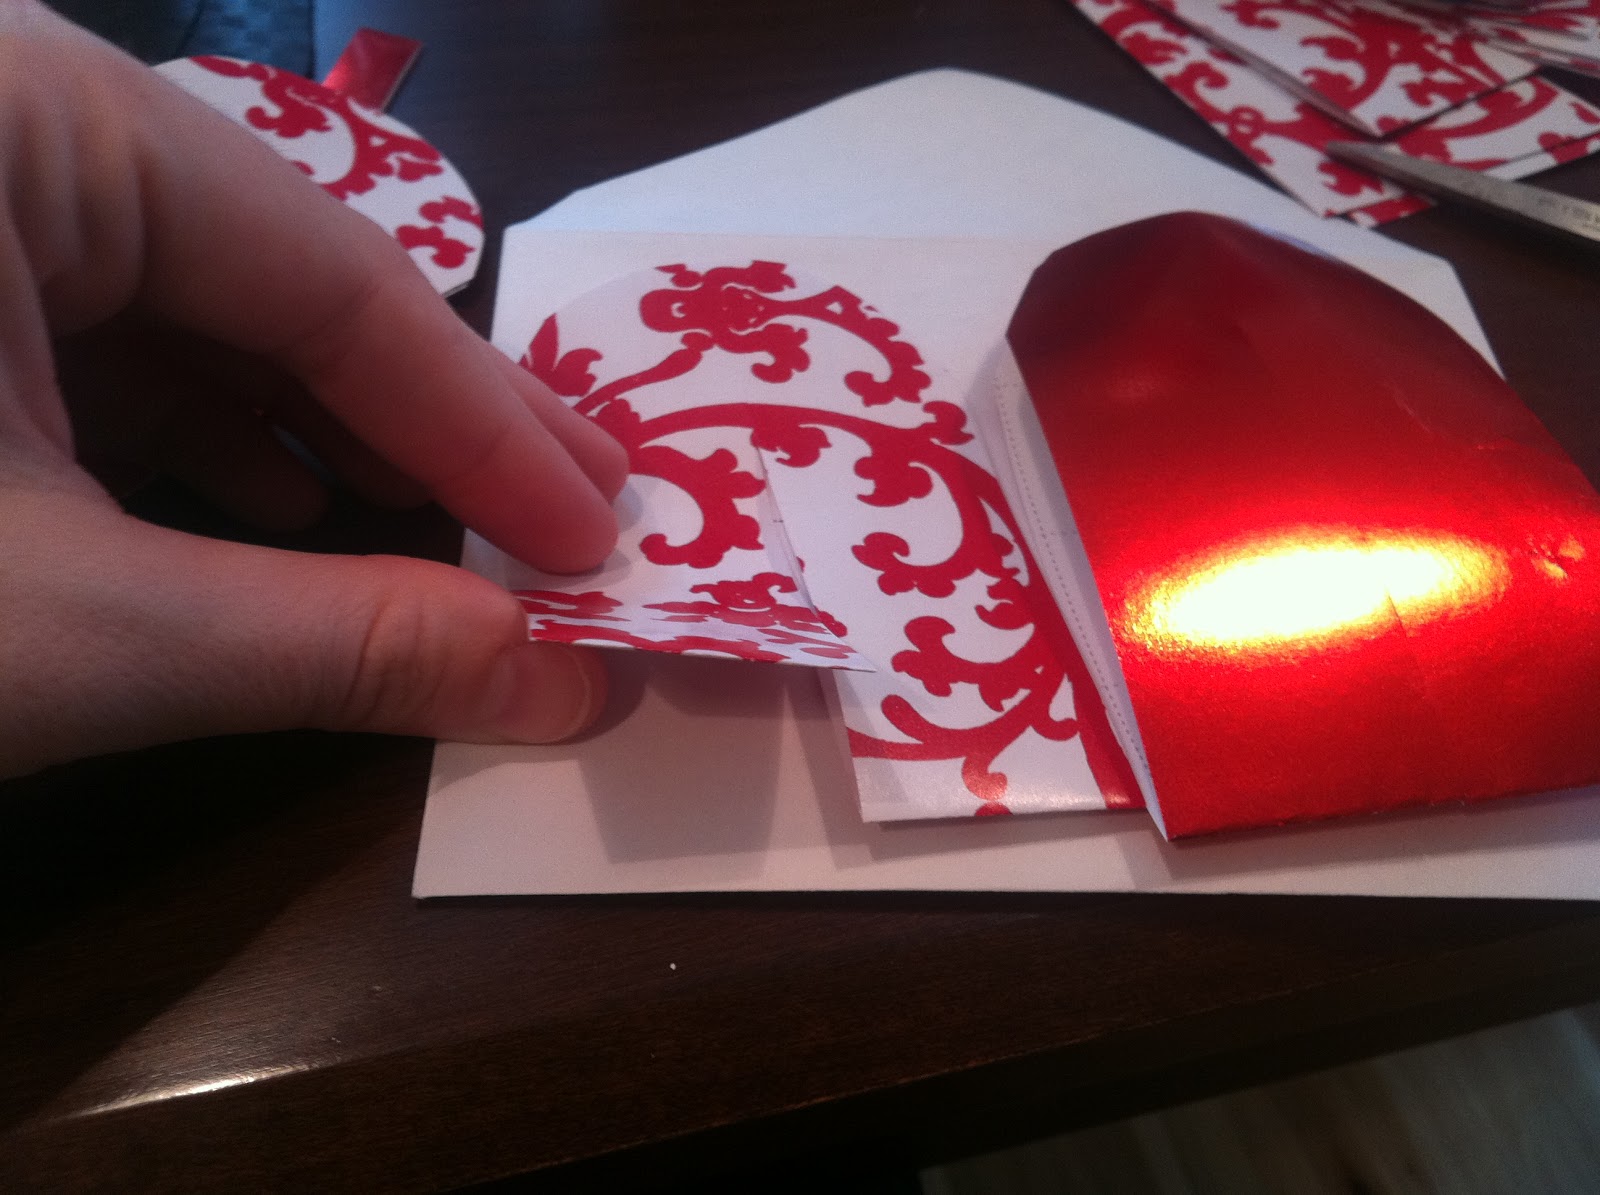
Here would be my basic instructions, complete with some really terrible pics that I took while crafting.
Supplies you need:
1. Wrapping paper, in at least two colors. Red and white are the traditional Danish colors from the flag, but you can definitely throw in some fun patterns or non-traditional colors.
2. Scissors
3. Tape
You start by cutting rectangles of even size out of your wrapping paper. The instructions in Delectably Danish say, three times as long as they are wide. You then fold them in half, hamburger style.
Utilizing the open end of the folds, you want to round them off into a semi-circle. I just free handed it, but you could definitely use a glass or a template of some kind. I lined mine up so that they at least had a similar round.
Then, using the folded end, you cut your slits on the folded side. Your folds have to be cut high enough to acount for the width of the other rectangle to be woven in, but not too high into the top of the heart. You can measure and mark off a top line for your cut if you want.
You can get creative on this in terms of how simple or how intricate you want your weaving to be.
I did one basket with two slits (easy), one with three slits of different widths (a little more complex), and one with four (that's as challenging as I get folks).
Some people get uber fancing and do patterns in the weave, or shapes. Not my thing.
Then the obvious next step, is to weave the two pieces of your heart together. You want to start your weaving with the inside pieces of the heart, alternating your pieces like so. The bottom weaving can be a little tricky, especially if you have a lot of narrow pieces. Work delicately!
The last step is to add a little paper handle, which is just a skinny piece of paper folded in half.
Pretty, right?
My mom's family has Danish roots and they have embraced many Danish traditions that they are now passing on to the younger generation. Each year, we come together for Cookie Weekend, where we bake Klejner, a Danish cookie.
While at cookie weekend this year, one of my aunt's brought the supplies to teach us to make Danish hearts that look like little woven baskets, which you may have seen gracing the Christmas tree before. My sister was interested in learning, and I was all for it too!
We freestyled it, but you can also find instructions in the book, Delectably Danish: Recipes and Reflections, by Julie Jensen McDonald. You better believe that each of us has a copy!
Here would be my basic instructions, complete with some really terrible pics that I took while crafting.
Supplies you need:
1. Wrapping paper, in at least two colors. Red and white are the traditional Danish colors from the flag, but you can definitely throw in some fun patterns or non-traditional colors.
2. Scissors
3. Tape
You start by cutting rectangles of even size out of your wrapping paper. The instructions in Delectably Danish say, three times as long as they are wide. You then fold them in half, hamburger style.
Utilizing the open end of the folds, you want to round them off into a semi-circle. I just free handed it, but you could definitely use a glass or a template of some kind. I lined mine up so that they at least had a similar round.
Then, using the folded end, you cut your slits on the folded side. Your folds have to be cut high enough to acount for the width of the other rectangle to be woven in, but not too high into the top of the heart. You can measure and mark off a top line for your cut if you want.
You can get creative on this in terms of how simple or how intricate you want your weaving to be.
I did one basket with two slits (easy), one with three slits of different widths (a little more complex), and one with four (that's as challenging as I get folks).
Some people get uber fancing and do patterns in the weave, or shapes. Not my thing.
Then the obvious next step, is to weave the two pieces of your heart together. You want to start your weaving with the inside pieces of the heart, alternating your pieces like so. The bottom weaving can be a little tricky, especially if you have a lot of narrow pieces. Work delicately!
The last step is to add a little paper handle, which is just a skinny piece of paper folded in half.
Pretty, right?
Saturday, December 17, 2011
Homemade Halloweenie!
So this post is just a few months and two holidays too late....
But I thought it would be fun to share how I made my Halloween costume. Baaaaa, I was a sheep!
WARNING: This costume is a major fire hazard. Between the glue and the cotton, this could be bad news bears. So wear with care.
Supplies:
Extra large white hooded sweatshirt (full zip)
Craft glue - I got the kind specific for fabrics. I ended up needing two and a half bottles!
Cotton balls - LOTS! I used over five bags
Black and white felt (for the ears)
Pipe cleaners (to shape the ears)
Scissors
I first cut off the arms of the sweatshirt right along the seam.
Then I glued cotton balls on. For a long time. I believe it took me a few hours, while watching the Badger football game. Plus I had to run out for more glue.
Then I cut some triangles out of felt for the ears. I stapled them around some pipe cleaners, to give them some shape. The staples made it look really homemade, but at that point I just wanted to be done.
Finally, it was time to hang it up to dry. If you try this, give it PLENTY of time to dry. I didn't make this until the same day that I wanted to wear it. That is probably how I ended up with glue in my hair. Oh well. still fun.
I just threw it on with a long sleeved black tee, with some leggings. And shorts. Because I don't believe that leggings count as pants.
The best part of the costume was how many laughs that I got. I think my sister laughed for about twenty minutes straight when I first walked in. And a dancing sheep, even more fun! I did shed quite a few cotton balls, which was also pretty funny.
It also was a lot of fun to wear while handing out candy. The kids were so cute!
Homemade holidays are the best.
But I thought it would be fun to share how I made my Halloween costume. Baaaaa, I was a sheep!
WARNING: This costume is a major fire hazard. Between the glue and the cotton, this could be bad news bears. So wear with care.
Supplies:
Extra large white hooded sweatshirt (full zip)
Craft glue - I got the kind specific for fabrics. I ended up needing two and a half bottles!
Cotton balls - LOTS! I used over five bags
Black and white felt (for the ears)
Pipe cleaners (to shape the ears)
Scissors
I first cut off the arms of the sweatshirt right along the seam.
Then I glued cotton balls on. For a long time. I believe it took me a few hours, while watching the Badger football game. Plus I had to run out for more glue.
Then I cut some triangles out of felt for the ears. I stapled them around some pipe cleaners, to give them some shape. The staples made it look really homemade, but at that point I just wanted to be done.
Finally, it was time to hang it up to dry. If you try this, give it PLENTY of time to dry. I didn't make this until the same day that I wanted to wear it. That is probably how I ended up with glue in my hair. Oh well. still fun.
I just threw it on with a long sleeved black tee, with some leggings. And shorts. Because I don't believe that leggings count as pants.
The best part of the costume was how many laughs that I got. I think my sister laughed for about twenty minutes straight when I first walked in. And a dancing sheep, even more fun! I did shed quite a few cotton balls, which was also pretty funny.
It also was a lot of fun to wear while handing out candy. The kids were so cute!
Homemade holidays are the best.
Subscribe to:
Posts (Atom)